Slit Seeder Rental: the Complete Guide
 James ThorntonLawn Equipment & Maintenance Expert | 20 Years
Thin, tired turf, bare patches, and weeds creeping in usually indicate that your lawn needs new grass plants, not just more fertilizer. When you want to add a large amount of quality seed efficiently, a slit seeder is one of the most effective tools available.
Unlike a basic broadcast spreader that just drops seed on the surface, a slit seeder cuts narrow grooves into the soil and places seed directly into those slits. This dramatically improves seed-to-soil contact, which is the single biggest driver of successful germination. For most homeowners, a slit seeder is too expensive to buy and store, but renting one for a day or weekend gives you professional-grade results at a fraction of the cost.
Slit seeding fits perfectly into larger projects like full lawn renovations, overseeding a thinning lawn, or upgrading an older lawn to newer, more disease-resistant varieties. This complete guide is written for serious DIY homeowners, intermediate lawn enthusiasts, and small property managers who want pro-level results without hiring a contractor.
In this guide, you will learn when slit seeding is the right choice, how to evaluate if your lawn is ready, how to choose the right rental machine, exact steps for using it correctly, realistic costs, and how to care for the lawn afterward so you do not waste your seed or your rental fee.
If your lawn looks thin, has bare spots larger than a dinner plate, or shows more weeds than grass in certain areas, you are probably a good candidate for slit seeding. Confirm by checking thatch depth and soil compaction: if thatch is less than about 1/2 inch and you can push a screwdriver at least 3-4 inches into moist soil with firm hand pressure, you can usually slit seed without heavy prep. If you cannot, plan on dethatching or aerating first.
Not sure if this is the right window to aerate? Check our aeration timing tool for the optimal aeration window by ZIP and grass type.
The core fix is to rent a slit seeder and run it in two directions with the right grass seed at the correct rate, followed by consistent light watering for several weeks. Avoid common mistakes like using bargain "contractor mix" seed, skimping on watering during germination, or slit seeding in the wrong season for your grass type. Expect to see germination starting in 7-14 days under good conditions and noticeable thickening in 4-6 weeks, with full results often visible after one full growing season.
Understanding Slit Seeding Basics
What Is a Slit Seeder and How Does It Work?
A slit seeder is a walk-behind or ride-on machine designed to cut narrow grooves into the soil and drop grass seed directly into those grooves in a single pass. This is different from a simple overseeder (sometimes just a spreader) that broadcasts seed on top of the lawn, where much of it can dry out, wash away, or become bird food.
It is also different from other turf equipment you might see at a rental counter:
- Broadcast overseeder or spreader: Spreads seed on the surface only, no soil disturbance.
- Power rake / dethatcher: Uses spring tines or blades to pull up thatch and shallow debris, but does not seed.
- Core aerator: Pulls plugs of soil out, improving compaction and sometimes used before overseeding.
The slit seeder combines soil opening and seed placement in one step. A series of vertically oriented blades or discs mounted on a shaft slice narrow furrows into the turf, typically about 1/4 to 1/2 inch deep, depending on adjustment and soil conditions. Directly behind or above this blade shaft sits a seed hopper. As you walk, the drive system turns a seed metering mechanism that drops seed down chutes so it falls into the freshly cut slits.
The reason this works so well is seed-to-soil contact. Grass seed needs firm contact with moist soil to germinate. If it sits on top of thatch or matted grass, only a fraction of it will sprout. By dropping seed into the slits, the machine protects it from wind and birds and ensures a much higher germination rate compared to surface spreading.
Key components of a typical rental slit seeder include:
- Engine: Usually a small gas engine (5-13 hp) that powers the blades and sometimes the drive wheels.
- Cutting blades / discs: Vertically oriented steel blades that cut the slits. Some models use flail-type slicers, others use notched discs.
- Seed hopper: A bin that holds your grass seed, often 20-40 pounds capacity, with an agitator and seed gate.
- Seed rate adjustment: A lever or dial that controls how much seed is metered out per square foot as you move.
- Drive system and controls: Handlebar controls for blade engagement, drive engagement, throttle, and sometimes depth adjustment.
When everything is set correctly and the lawn is prepared, the slit seeder lets you overseed large areas quickly with consistent coverage and optimal placement, which is why it is standard equipment for turf professionals.
When Slit Seeding Is the Right Choice (and When It Is Not)
Slit seeding shines when you already have some turf but want to dramatically thicken it or upgrade to better grass varieties. It is rarely the best first step for a lawn that is essentially dead or buried under thatch.
Situations where slit seeding is usually the right choice include:
- Thinning lawns: If you can see soil between grass plants when you look straight down, slit seeding will add density.
- Patchy or bare areas: Spots that have lost grass due to traffic, pets, or minor disease damage respond very well.
- Upgrading grass varieties: Older lawns seeded decades ago can benefit from improved Kentucky bluegrass, tall fescue, or ryegrass cultivars with better color and disease resistance.
However, slit seeding is less effective in some situations:
- Completely dead lawns with heavy thatch: If more than about 50 percent of the lawn is bare or if thatch is thicker than about 1/2 inch, a more aggressive renovation or power raking is usually needed first.
- Severe soil compaction: If you fail the screwdriver test and cannot push a screwdriver 3-4 inches into moist soil, the slits may not penetrate well and roots will struggle. Core aeration before overseeding is often the better choice.
- Very rocky or uneven lawns: Rocks and high spots can damage blades, and the seed placement will be inconsistent. In those cases, spot repair and grading may be smarter.
It also helps to compare slit seeding to other methods you might be considering:
Slit seeding vs broadcast overseeding: Broadcast seed on an unprepared lawn might yield 20-40 percent germination in real-world conditions. Slit seeding can dramatically increase that rate because more seed ends up in moist soil. If you are investing in quality seed for a large area, the improved efficiency often justifies the rental cost.
Slit seeding vs core aeration plus overseeding: Core aeration is better at relieving compaction and improving long-term root growth. If your primary issue is compaction, aerate first, then overseed by broadcast or a lighter pass with a slit seeder. If compaction is minimal and the main goal is establishing new plants, slit seeding can be more efficient.
Slit seeding vs sod: Sod gives instant cover but costs far more per square foot and still requires careful watering. Slit seeding is slower, but for larger properties it is much more cost effective, especially when you only need to thicken or improve existing turf instead of bare soil coverage.
Who Should Consider Renting a Slit Seeder?
Because slit seeders are relatively heavy, complex machines, they fit best for projects above a certain size and for users comfortable with powered equipment. In general, renting a slit seeder makes sense for:
- Homeowners with medium to large lawns: If your lawn is roughly 2,000 to 15,000 square feet or more, manual methods become very inefficient, and a rental machine will save huge amounts of time and effort.
- DIYers doing full renovations or overseeding: If you are planning a full overseed or major renovation, slit seeding is one of the most reliable ways to get your new seed established.
- Small property managers and landlords: Multi-unit rentals, small commercial sites, or HOA common areas can benefit from periodic slit seeding to keep high-traffic turf healthy.
There are situations where hiring a pro might be better than renting:
If you have steep slopes, complex irrigation and landscape beds, significant thatch, or no way to transport a heavy machine, a professional lawn service may be more efficient. Additionally, if you are not comfortable operating gas-powered equipment or dealing with adjustments and troubleshooting, a pro can reduce the risk of user error that wastes seed.
Planning Your Slit Seeder Rental: The Complete Pre-Project Checklist
Determining If Your Lawn Is Ready for Slit Seeding
Before you reserve a slit seeder, it is worth confirming that your lawn is actually at the right stage and condition for this approach. A few simple tests can save you from renting at the wrong time or wasting seed on poor soil prep.
Start with a visual assessment. Indicators that slit seeding is appropriate include thinning turf where you can see soil between plants, scattered bare spots larger than a handprint, or areas where weeds are gaining ground but there is still 30-50 percent grass present. An aging lawn that has never been overseeded in 10 or more years is often an ideal candidate.
Next, assess compaction. Use a long screwdriver or a sturdy garden trowel. Water the lawn lightly the day before if it is very dry, then try to push the tool into the soil. If you cannot get it at least 3-4 inches deep with firm hand pressure, compaction is likely significant enough that you should core aerate first or in conjunction with slit seeding. If it goes in fairly easily, the slit seeder blades will usually penetrate adequately.
Then check thatch depth. Cut out a small plug of turf with a knife or trowel so you can see a cross-section. Thatch is the spongy brown layer between the soil surface and the green leaves. If thatch measures more than about 1/2 inch thick, many university extension services recommend dethatching before overseeding because thick thatch can keep seeds from reaching soil and can harbor disease.
- Penn State Extension recommends dethatching when thatch exceeds 0.5 inches, then overseeding once the surface debris is removed.
If you see water pooling after normal rainfall or irrigation, that also points to compaction or grading issues that slit seeding alone will not fix. In that case, plan to combine aeration or light topdressing with your seeding project.
Best Time of Year to Slit Seed (By Grass Type and Climate)
Timing slit seeding correctly is as important as using the right machine. Grass seed has specific temperature and weather requirements. If you slit seed at the wrong time, germination will be slow, weak, or may fail altogether.

For cool-season grasses like Kentucky bluegrass, perennial ryegrass, and tall fescue, the best window in most northern and transition-zone climates is late summer to early fall. Soil temperatures are still warm, air temperatures are starting to cool, and annual weed pressure is declining. In practical terms, this usually means late August through September in the Upper Midwest and Northeast, and into early October in some milder regions.
A secondary window exists in early spring, roughly when soil temperatures are consistently above 50-55 degrees Fahrenheit and frost risk is decreasing. However, spring seeding must compete with summer heat and weeds, so success rates are usually lower than fall. If you slit seed in spring, be prepared for more frequent watering and possibly pre-emergent herbicide planning the following year.
For warm-season grasses such as Bermuda, zoysia, centipede, and St. Augustine (where seeded varieties are available), the preferred time is late spring into early summer when the lawn is fully out of dormancy and actively growing. Soil temperatures for warm-season grass seeding are typically in the 65-70 degree Fahrenheit range or higher. In the Deep South, this might be April to June. In the transition zone, May to early July is more typical.
Regional climate influences your exact window:
- Northern zones: Fall slit seeding from late August through mid-September is ideal for cool-season turf.
- Transition zone: You may be managing fescue, bluegrass, or even Bermuda. Match your seeding window to your dominant grass type and avoid peak summer heat or winter extremes.
- Southern zones: Aim for late spring to very early summer for warm-season grasses when nights are warm and growth is vigorous.
As a quick weather checklist, look for soil temperatures in the appropriate germination range and a 2-3 week period without forecasted extreme heat waves, hard frosts, or multi-day heavy storms that could wash seed out of the slits.
Choosing the Right Grass Seed Before You Rent
Slit seeding only succeeds if you are putting the right seed into the ground. Renting a slit seeder before you know what seed you need and how much can lead to rushed decisions and subpar results. Plan your seed choice and quantity before you book the machine.
First, match the seed to your site conditions. Observe sun patterns. Areas that get 6 or more hours of direct sun per day can take most full-sun blends. Spots with 3-6 hours of sun benefit from shade-tolerant tall fescue or fine fescues in cool-season regions. Deep shade (less than 3 hours of filtered light) is usually better for groundcovers or mulch beds rather than grass.
Decide between blends and single-species seed. Most home lawns perform best with blends or mixtures, for example, a mix of Kentucky bluegrass and perennial ryegrass, or a turf-type tall fescue blend with several cultivars. This diversity improves disease resistance and adaptability. Single-species seed is usually reserved for very specific performance goals or sports turf.
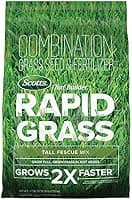
Avoid cheap "contractor" mixes that often contain high percentages of annual ryegrass, coarse varieties, or other fillers. These may green up quickly but decline after a season or create a patchy, inconsistent lawn. Read the seed label and look for low weed seed content (ideally under 0.01 percent) and zero noxious weed seed.
Improved cultivars can offer real benefits. Many modern tall fescues, for example, have better drought tolerance, disease resistance, and darker color than older varieties. Check product descriptions or university variety trial reports for ratings on drought tolerance and disease resistance in your region.
Next, estimate how much seed you need. Slit seeding generally uses slightly lower rates than broadcast overseeding because the placement is more efficient. As a rule of thumb for cool-season turf:
- Overseeding an existing lawn: About 3-5 pounds of tall fescue blend per 1,000 square feet, or 1-3 pounds for Kentucky bluegrass or perennial ryegrass mixes, depending on label directions.
- Full renovation on mostly bare soil: Closer to 6-8 pounds of tall fescue per 1,000 square feet or 2-3 pounds of Kentucky bluegrass, but always follow the specific bag recommendations.
Warm-season grasses have different seeding rates, often lower because of their spreading habit. For example, seeded Bermuda might be applied at 1-3 pounds per 1,000 square feet. Always base your final decision on the label for the specific variety you choose.
Once you know your lawn square footage and target seeding rate, you can purchase the correct number of bags ahead of time and set up the slit seeder accurately instead of guessing on the fly.
Slit Seeder Rental: How to Choose the Right Machine
Common Slit Seeder Rental Types and Features
At rental centers, you will usually see a few models of slit seeders, often marketed as overseeders or slice seeders. While brand names vary, they tend to fall into similar categories in terms of size, drive type, and features.
Most homeowner-accessible machines are walk-behind units with a working width of 18 to 24 inches. Some have a self-propelled drive system that moves the machine forward, while others rely on you pushing them while the blades are engaged. Self-propelled units are easier to handle on larger lawns and slopes, especially since the machines can weigh 150-300 pounds.
When comparing models, look for:
- Adjustable blade depth: You should be able to set the blades to cut about 1/4 to 1/2 inch into the soil. Too shallow and seed placement is poor; too deep and you risk damaging existing turf.
- Easy seed rate calibration: A clear seed rate scale or chart helps you match the output to your target pounds per 1,000 square feet.
- Reliable engine and controls: Smooth throttle control, accessible on/off switch, and separate levers for blade and drive engagement improve user safety and comfort.
- Seed hopper capacity and agitation: A hopper that holds at least 20-30 pounds of seed and has an agitator to prevent bridging makes it easier to cover larger areas without constant stops.
Some premium machines also have vertical blades that can be switched for dethatching action, or they include a small catch bag, though most slit seeders drop debris and seed directly into the turf.
Matching Machine Size to Your Lawn
The size of your lawn and the layout of your property should guide your choice of slit seeder. A 22-inch machine that is self-propelled will handle typical suburban lawns in the 5,000-10,000 square foot range efficiently. If your lawn is much larger, for example 20,000-30,000 square feet or more, you may want a wider machine or be prepared for a longer project day.
Consider access. Measure gate openings and tight passageways. Many walk-behind slit seeders are about 24-27 inches wide at the wheels or handlebars. If you have narrow gates, you may need a smaller unit or plan to seed only front or back areas accessible to the machine.
Also account for slopes and terrain. On steep hills, a heavier self-propelled machine provides better traction and control but requires more experience to handle safely. On very bumpy lawns, a slightly lighter machine can be easier to maneuver, but you might need to slow down and adjust depth frequently.
Rental Terms, Costs, and What to Ask the Rental Desk
Slit seeder rental costs vary by region and machine size, but a typical range for a homeowner-grade walk-behind overseeder is approximately 80 to 150 dollars per day. Some shops offer half-day rates or discounted weekend packages where you pick up Friday afternoon and return Monday morning for roughly 1.5 times the daily rate.
Before you commit, clarify:
- What is included in the rental? Check whether fuel, delivery, or a trailer is included or extra.
- Transport requirements: Slit seeders are heavy and awkward. You may need a pickup, small trailer, or ramp system. Ask the exact weight and dimensions.
- Damage and cleaning policies: Understand your responsibility for blade damage, clogged seed hoppers, or cleaning dirt off the machine.
- Maintenance status: Ask how often the blades are sharpened and how the seed rate is calibrated. A well-maintained machine will perform better and reduce frustration.
At the rental desk, request a quick walk-through. Ask them to demonstrate how to:
- Start and stop the engine
- Engage and disengage blades and drive
- Adjust blade depth
- Open and close the seed gate and set the seed rate
Take phone pictures of any decal charts on the machine that show recommended settings for seeding rates. These are often on the hopper lid or near the seed gate lever.
Slit Seeder vs Other Grass Seeder Rental Options
When you walk up to the rental desk, "grass seeder rental" can mean three different machines, and the staff will not always ask which job you are doing. A slit seeder (also called a slice seeder) cuts grooves and drops seed into them in one pass, and it is the right grass seeding machine rental for overseeding thin turf. An overseeder is essentially the same machine, sometimes without the seed box agitator. A core aerator is not a seeder at all, but pairing an aerator rental with broadcast seeding is a gentler option for lawns with compaction as the main problem. Big-box rental desks like Home Depot typically carry slit seeders in the 75 to 95 dollar range for four hours, with daily rates around 110 to 150 dollars; independent equipment yards often beat those prices and maintain sharper blades.
How to Use a Slit Seeder: Step-by-Step
Step 1: Prepare the Lawn Surface
Proper preparation often matters more than the machine itself. Start by mowing the lawn shorter than usual. For cool-season grasses, cut down to about 2 inches. For warm-season grasses, you can mow in the 1.5 to 2 inch range before slit seeding. Bag or rake up clippings so they do not interfere with seed placement.
If thatch was borderline thick in your earlier check, consider a light power raking or dethatching first, especially if you are in the 0.25-0.5 inch range. Remove debris thoroughly afterward. If compaction was moderate, aerate a week or two before slit seeding, letting cores break down, then proceed with the slit seeder. The improved soil environment can significantly boost root establishment.
Mark sprinkler heads, shallow irrigation lines, landscape lighting wires, and any exposed roots or obstacles. Slit seeder blades can damage or be damaged by these. Use flags or marking paint so you can lift the blades or steer around them.
Step 2: Calibrate Seed Rate and Blade Depth
Next, set up the slit seeder itself. Begin with blade depth. The goal is to cut through existing grass canopy and thatch into the top 1/4 to 1/2 inch of soil, not to till deeply. On most machines, this is adjusted with a lever or knob that raises or lowers the blade shaft relative to the wheels. Start at a conservative depth and test on a small, inconspicuous section. You should see narrow slits with disturbed soil visible, without ripping out large chunks of turf.
Then calibrate the seed rate. Check your seed bag for the recommended pounds per 1,000 square feet. Find the seed rate chart on the machine, which may list settings corresponding to output at a given walking speed. These charts are estimates only, so it is wise to test. One simple test is to mark off a 200 or 500 square foot area, add a known amount of seed to the hopper, set the machine to a moderate setting, and walk at your normal pace. After covering the area, weigh or visually estimate how much seed is left. Adjust the setting up or down until you are close to your target rate.
Remember that you will likely make at least two passes in different directions, so you can set the machine for roughly half your total target rate per pass. For example, if you want 4 pounds of tall fescue per 1,000 square feet and will seed in two directions, aim for about 2 pounds per 1,000 per pass.
Step 3: Operating Technique and Pass Pattern
Once calibrated, start with the perimeter. Many operators like to make a pass around the edges of the lawn with blades engaged but seed gate closed to define the work area and avoid throwing seed into beds or hardscape. Then open the seed gate and begin your first main pass in straight lines across the area.
Maintain a steady pace. Walking too fast will reduce seed density, and going too slow may over-apply and cut too aggressively. Keep your hands light on the handles and do not force the machine to turn sharply while blades are buried. At the end of each pass, disengage the blades before pivoting, then re-engage when straight again.
After completing the first direction, close the seed gate, reposition yourself at a 45 or 90 degree angle to your original pattern, reopen the seed gate, and run the second pass. Crossing patterns helps fill any skips and distributes seed more evenly among existing plants.
Check your work periodically. You should see slit lines across the lawn with some seed visible in the grooves but not piled on the surface. If you see large bare streaks with no seed, adjust the seed gate slightly open. If you see heavy lines of seed sitting on top of thatch, your blade depth is likely too shallow.
Step 4: Clean Up and Immediate Aftercare
Once slit seeding is finished, lightly blow or rake seed off hard surfaces back into the lawn. You generally do not need to cover the slits with additional topdressing, though in some high-end renovations a very thin layer of compost or sand can be applied to improve seedbed conditions.
Watering should start as soon as practical after seeding. The goal is to keep the top 1/2 to 1 inch of soil consistently moist but not saturated. In many climates, this means short, light waterings 1-3 times per day for the first 2-3 weeks, depending on weather and soil type. If you let the slits dry out completely between waterings during the germination phase, you will lose a significant portion of your seedling potential.
After you are done, follow the rental center's instructions for basic cleaning. Remove stuck debris from the blades, wipe excessive soil from the machine, and close the seed gate. This reduces the chance of extra cleaning fees and helps the next renter get a functional unit.
Post-Seeding Care: Protecting Your Investment
Watering Schedule and Adjustments
The first 4-6 weeks after slit seeding determine whether your project succeeds. Watering is the most critical factor under your control. For cool-season grasses in moderate fall weather, a typical schedule might start with two light waterings per day, morning and mid-afternoon, delivering enough to moisten the seed zone without runoff. In hotter or windy conditions, you may need a third, very light cycle.
As soon as you see consistent germination, usually 7-14 days after seeding for ryegrass and tall fescue and up to 21 days for Kentucky bluegrass, gradually transition to fewer but deeper waterings. Shift toward once-per-day irrigation, then every other day, so that water penetrates 3-4 inches deep. This encourages seedlings to develop deeper roots instead of remaining shallow.
After about 4-6 weeks, your goal is to be at a normal maintenance schedule of roughly 1 to 1.5 inches of total water per week from irrigation and rainfall combined. Use a rain gauge or small containers to verify how much water is actually reaching the lawn.
Mowing Timing and Height
Mowing too early can pull out seedlings, but waiting too long can create a leggy, weak stand. For cool-season grasses, a good rule is to mow when the new grass reaches about 3 to 3.5 inches tall. Use a sharp blade and mow no more than the top one-third of the leaf height. That means your first cut will often be down to around 2 to 2.5 inches.
Make sure the soil is relatively firm and not saturated when you mow. Wet soil increases the risk of rutting and uprooting seedlings. Mow at reduced speed and avoid sharp turns that twist the turf.
After the first or second mowing, gradually raise the mowing height to your long-term target. For most cool-season home lawns, that is 3 to 4 inches. Taller mowing promotes deeper roots and better drought tolerance. For warm-season grasses, typical heights are slightly lower but still within the recommended range for each species.
Fertilization and Weed Control After Slit Seeding
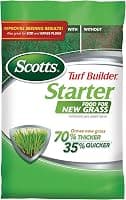
Fertilizer timing after slit seeding should be strategic. Many professionals apply a starter fertilizer at or just after seeding. Starter fertilizers are higher in phosphorus to support root development. Rates are typically in the range of 0.5 to 1 pound of nitrogen per 1,000 square feet, but always follow label instructions and local regulations about phosphorus use.
- Ohio State University Extension notes that applying 0.5-1.0 lb nitrogen per 1,000 sq ft at seeding improves seedling establishment for cool-season grasses.
If you missed a starter application at seeding, you can apply a light feeding about 3-4 weeks after germination once you have mowed at least once. Avoid heavy nitrogen applications early on, which can cause rapid, weak top growth without proportional root development.
Weed control is more complicated after seeding. Many pre-emergent herbicides that prevent crabgrass also inhibit grass seed germination. If you slit seed in fall, it is usually best to skip pre-emergents until the following spring and rely on good mowing and possibly targeted post-emergent products labeled as safe for new seedlings after a certain number of mowings.
If you slit seed in spring and must control crabgrass, look for products labeled as safe for use with new seedings or delay herbicide until after the new grass has been mowed at least 2-3 times, following the product directions closely.
What Other Guides Miss: Common Mistakes to Avoid
Ignoring Soil and Thatch Diagnostics
Many basic articles on slit seeding fail to emphasize diagnostics. If you slit seed into compacted, poorly draining soil or through a thick thatch layer, the machine will run, but results will be disappointing. Always confirm that thatch is under about 1/2 inch and that a screwdriver can reach at least 3-4 inches into moist soil. If either test fails, schedule dethatching or aeration before or in conjunction with slit seeding.
Seeding at the Wrong Time for Your Region and Grass Type
Another frequent oversight is generic timing advice. "Fall is best" is true for many cool-season lawns but not for warm-season grass regions, and even within cool-season zones, specific windows matter. Check soil temperatures and local climate patterns rather than going solely by the calendar. Seeding too late in fall or too early in spring often leads to weak seedlings that cannot handle winter or summer stress.
Misusing Seed Rates and Machine Settings
Some guides gloss over the need to calibrate the seed rate and rely on the machine's default setting. This can easily lead to seeding at half or double the intended rate. Always base your seed gate setting on the product label and test it in a small area. Also remember the two-pass strategy: run at roughly half rate per pass and cross your pattern. This is more forgiving of small calibration errors and produces more uniform coverage.
Skipping Post-Seeding Watering Discipline
Finally, many instructions mention watering but do not convey how critical consistency is. Brief dry-downs of the seed zone in the first 2-3 weeks can drastically reduce germination. Set timers, adjust sprinkler coverage, and monitor moisture daily during this period. If you cannot commit to frequent light watering during germination, it may be better to delay your slit seeding project until you can.
Putting It All Together: Slit Seeder Rental as Part of a Complete Lawn Strategy
Used correctly, a slit seeder rental is a powerful tool that fits into a broader lawn care plan. It does not replace basic practices like mowing at the right height, proper fertilization, or periodic aeration, but it is one of the most efficient ways to introduce new, improved grass plants into an existing lawn.
A practical yearly or bi-yearly strategy might look like this for a cool-season lawn: address compaction with core aeration as needed, dethatch if the layer approaches 1/2 inch, then in late summer or early fall perform slit seeding with high-quality improved cultivars. Follow with disciplined watering, sensible starter fertilization, and good mowing. Over several seasons, this approach transforms thin, mixed lawns into dense, resilient turf.
If you want to go deeper into related topics, read Overseeding Best Practices to refine your seed and timing decisions, How to Repair Bare Patches in Your Lawn for spot treatments between major projects, and How to Aerate Your Lawn the Right Way to handle compaction and root health. Combined, these practices make slit seeder rental: the complete guide not just a one-time project, but a repeatable method in your long-term lawn care toolkit.
When you are ready to rent, look for a machine with adjustable blade depth, clear seed rate settings, and a self-propelled drive if your lawn is larger or sloped. Match your grass seed carefully, confirm your lawn is ready with simple tests, and plan at least half a day to work methodically. The result, with proper aftercare, is a thicker, healthier lawn that can outcompete weeds and handle stress far better than before.
To continue building your lawn care skills, check out our guide on Overseeding Best Practices so you can fine-tune timing, seed selection, and follow-up care for every future project.
Free Lawn Care Tools
Common questions about this topic
A slit seeder is a walk-behind or ride-on machine designed to cut narrow grooves into the soil and drop grass seed directly into those grooves in a single pass. This is different from a simple overseeder (sometimes just a spreader) that broadcasts seed on top of the lawn, where much of it can dry out, wash away, or become bird food.
Because slit seeders are relatively heavy, complex machines, they fit best for projects above a certain size and for users comfortable with powered equipment. In general, renting a slit seeder makes sense for:
Check two things: thatch depth and soil compaction. Thatch should be less than about 1/2 inch thick, and you should be able to push a screwdriver 3–4 inches into moist soil with firm hand pressure. If you pass both checks, you can usually slit seed without major prep. If you fail either, plan on dethatching or core aerating first.
Slit seeding is a better choice when you want higher germination and more efficient use of seed, especially on thinning or patchy lawns. A broadcast spreader drops seed on the surface, where much of it can dry out, wash away, or be eaten by birds. Slit seeding cuts grooves in the soil and places seed directly into them, dramatically improving seed-to-soil contact and results. This is especially worthwhile when you are using quality seed over a large area.
Under good conditions, new grass typically starts germinating in 7–14 days after slit seeding. You should see noticeable thickening in 4–6 weeks as the new plants fill in bare and thin spots. The lawn often continues to improve over one full growing season as the new grass matures. Consistent light watering during germination is critical to achieving these results.
Slit seeding is not ideal if more than about 50% of the lawn is bare or if there is more than 1/2 inch of thatch, because the blades cannot place seed into good soil. It also struggles in very compacted soil where you cannot push a screwdriver 3–4 inches into moist ground, or in very rocky, uneven lawns that can damage the blades. In these cases, more aggressive renovation, dethatching, core aeration, or grading is usually needed before or instead of slit seeding.
Expect 75 to 95 dollars for a four-hour slit seeder rental at big-box stores like Home Depot, or roughly 110 to 150 dollars for a full day. Independent equipment rental yards often run 10 to 20 percent cheaper and tend to keep blades sharper. A typical quarter-acre lawn takes two to three hours including setup, so the four-hour window is enough for most homeowners.
Functionally very little; the names are used interchangeably at most rental desks. Both machines cut shallow grooves in the soil and deposit seed directly into them, which is why they hit much higher germination rates than broadcast seeding. If a rental yard lists both, the "overseeder" is sometimes a lighter-duty version, so ask which model cuts deeper and choose that one for compacted or thatchy lawns.
Loading product recommendations...
Related Articles
- Seeding/Overseeding & Establishment
Can I Just Sprinkle Clover Seeds on My Lawn
Jun 15, 2026•12 min read - Seeding/Overseeding & Establishment
Pennington Smart Seed Planting Guide: Step-by-step Instructions
Mar 29, 2026•7 min read - Seeding/Overseeding & Establishment
Is It Too Late to Seed Your Lawn? Spring and Fall Deadlines by Region
Mar 27, 2026•7 min read