

Hydroseeding: How It Works, Cost, and Whether It's Worth It
 Marcus GreenTurf Management Pro | 18 Years
As an Amazon Associate we earn from qualifying purchases.
You are staring at a yard that is more dirt than grass, maybe a new-build lot scraped down to bare subsoil, maybe an old lawn that thinned out and gave up. You want it green and thick, and you would rather not spend the next three months coaxing a bag of seed to life one hand-watering at a time. Somewhere in your research you hit a photo of a lawn sprayed a startling shade of green, and now you are wondering what hydroseeding actually is and whether it is the shortcut it looks like.
Short version: hydroseeding is a real, proven way to establish a lawn, and it has genuine advantages, but it is not magic. This guide walks through what is actually in that green slurry, how the process works, what it tends to cost, how it stacks up against plain seed and sod, and the timeline and watering commitment that decide whether your hydroseeded lawn thrives or fizzles.
New lawn coming in patchy? If bare spots or discolored patches show up after you seed or hydroseed, snap a photo for a free AI diagnosis to help point to whether it is a disease, a watering problem, or a soil issue before you tear it up and reseed. Uneven germination is usually fixable once you know the cause.
Fast Answer: Hydroseeding sprays a wet slurry of grass seed, protective mulch, a sticky tackifier, and starter fertilizer over prepared soil in one pass. The mulch blanket holds moisture against the seed, so hydroseeded lawns often germinate faster and more evenly than dry broadcast seed, and the tacky mix grips slopes that loose seed would wash right off. It usually costs more than seeding by hand and far less than sod.
Is it worth it? For medium to large yards, and especially for slopes or erosion-prone ground, hydroseeding is often the sweet spot between price and results. For a small lawn or a few bare patches, plain seed or overseeding is usually the smarter spend. Either way, the seed still needs consistent water for the first few weeks, so the real question is not the method, it is whether you will keep it moist while it establishes.
What hydroseeding actually is
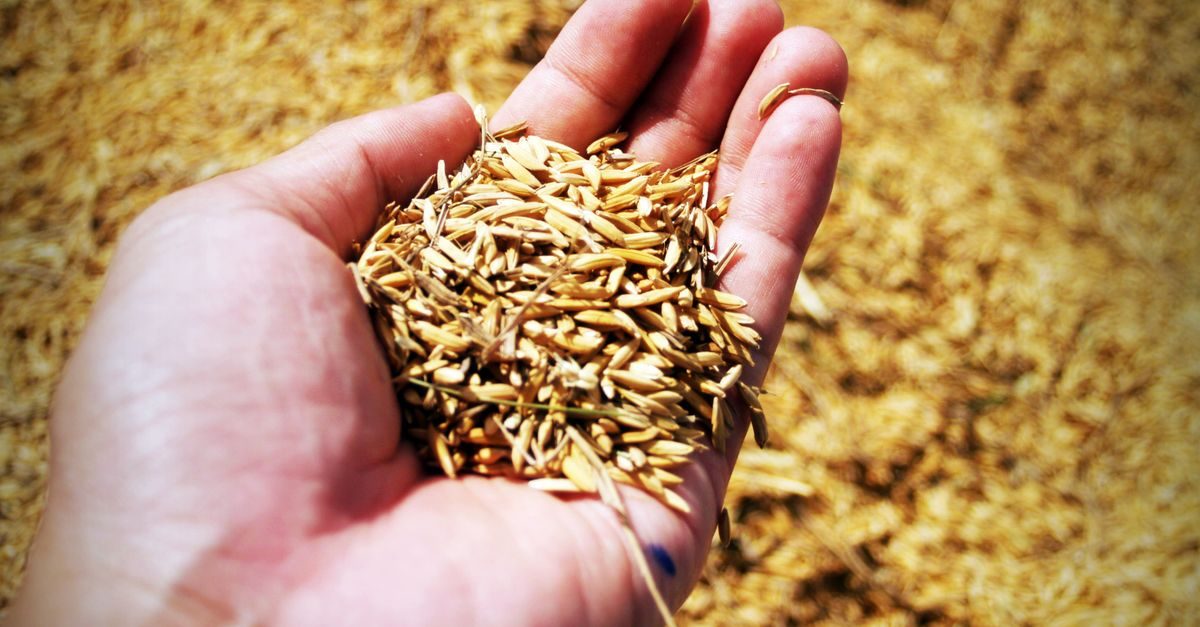
Hydroseeding, sometimes called hydraulic seeding or hydro-mulching, plants grass by spraying it on as a liquid instead of spreading dry seed and raking it in. A machine blends everything into a water-based slurry, keeps it agitated so nothing settles, then pumps it through a hose or cannon onto your prepared soil. The result is that vivid green coating you have seen on new construction sites and roadside embankments.
A good slurry usually blends four things, plus one that is just for show, though the exact mix varies by product and site:
- Grass seed chosen for your climate and conditions, the same seed you could buy in a bag, just suspended in the mix.
- Mulch, usually ground wood fiber or recycled paper and cellulose fiber. This is the heart of the system. It forms a damp blanket that shades the seed, cushions it, and holds water against it so the surface does not dry out between waterings.
- Tackifier, a natural or synthetic binder that acts like a mild glue. It locks the mulch and seed to the soil so wind and rain do not carry them off, which is exactly why hydroseeding shines on slopes.
- Starter fertilizer in most mixes, a phosphorus-forward blend that feeds the young roots as they push into the soil, though some formulations skip it.
The fifth ingredient is the famous green dye. It is a harmless colorant whose only job is to let the operator see exactly where the slurry has landed so coverage stays even. It is not fertilizer or what makes the grass grow, and the color typically fades within a week or two as the real grass comes up underneath, though that varies with sunlight, rain, and the specific product.
How the process works
Whether a pro does it or you rent a unit, the sequence is the same. The soil gets prepped first: cleared of debris and old growth, graded smooth, and ideally tested and amended so the pH and nutrients are right. Then the slurry is sprayed over the area in an even coat. After that it is all about water, because the mulch keeps the seed bed moist only as long as you keep watering it until the grass is up and rooted.
What hydroseeding costs
Here is where honesty beats a made-up number. Hydroseeding pricing swings hard based on your region, your lawn size, how much prep the ground needs, the seed blend you choose, and whether a contractor has to travel far to reach you. A national average cannot tell you what your yard will cost, but it does tell you whether a quote is in the right neighborhood.
Two 2026 cost surveys land close together. Lawn Love puts professional hydroseeding at $0.10 to $0.19 per square foot with materials and labor included, which comes to $100 to $190 for a 1,000-square-foot yard and $4,356 to $8,276 for a full acre. LawnStarter's range runs $0.07 to $0.21 per square foot, and it notes that most hydroseeding companies charge a minimum service fee of $300 to $500. That minimum is the number to watch on a small lot. A small yard pays the minimum no matter what the per-foot rate says.
Going the DIY route shifts the money around rather than erasing it. Lawn Love estimates $398 to $725 for equipment and materials, rental included, and LawnStarter lists the hydroseeding machine rental alone at $220 to $463 a day. Hold every quote up against those ranges.
What holds true almost everywhere is the relative position: hydroseeding typically costs more than buying seed and spreading it yourself, and much less than sod for the same area. Per square foot, the price usually drops as the job gets bigger, because setup and cleanup are a fixed cost spread across more ground. That is why it is a favorite for large lots and can look expensive on a tiny yard, where a bag of seed would have done the job for far less. For real numbers, get two or three local quotes and compare them against a DIY seed project for the same square footage.
DIY hydroseeding versus hiring a pro
You can hydroseed yourself. Rental yards and some home centers carry small hydroseeding units, jet-agitated hoppers that mix and spray a slurry you load with seed, mulch, and tackifier bought separately. For a hands-on homeowner with a mid-size yard, it is a real option and can save money over a contractor.
The economics only work in a certain window, though. On a small lawn, the rental day-rate plus bagged mulch and tackifier often lands close to a pro's price, and you still do the labor and the messy cleanup of the tank and hoses. On a very large property, a single small-tank unit means a lot of refill-and-spray cycles. DIY hydroseeding makes the most sense for medium lawns, where you want better coverage than hand-spreading gives but a contractor quote feels steep.
If you are pricing a DIY job, start by nailing down how much seed you actually need, because seed is the ingredient you cannot fudge. Run your square footage and grass type through our seed quantity calculator so you buy the right amount instead of guessing, then match your mulch and tackifier to that coverage. And be honest about the mess and the learning curve, since first-time slurry mixes are easy to get too thick or too thin.
Hydroseeding versus seeding versus sod
Hydroseeding is not the only way to start a lawn, and not always the best. Here is how it sits between the two methods people compare it to.
Versus traditional dry seeding. Both plant from seed, so the end result is the same kind of lawn. The difference is delivery. Broadcast seeding with a spreader is cheap and simple, perfect for small, flat areas, but bare seed dries out fast, feeds the birds, and washes downhill in a storm. Hydroseeding wraps that same seed in a moisture-holding, erosion-resisting blanket for faster, more even germination and far better results on slopes, at a higher price. Small and flat, plain seed usually wins on value. Large or sloped, hydroseeding earns its keep.
Versus sod. Sod is the instant option: mature grass laid down like carpet for a lawn the same day, at the highest cost of the three. Hydroseeding cannot match that speed, since you are still growing grass from seed, but it costs a great deal less and opens up a much wider range of grass varieties than the handful your local sod farm grows. Our full sod versus seed breakdown digs into that trade-off in detail, and nearly all of it applies to hydroseed as the seed side of the comparison. For what the sod route actually costs, see our guide to the cost to install sod.
A couple of other establishment methods are worth knowing. If you have an existing thin lawn rather than bare ground, renting a slit seeder can be a better fit than a full hydroseed, and our slit seeder rental guide covers when that machine is the right call. And if you are only chasing a few thin spots, you may not need any of this, since a straightforward overseeding pass over your current turf is cheaper and less disruptive than starting over.
How long hydroseeding takes to grow
This is the question everyone asks, and the honest answer is that hydroseeding follows the same biology as any seed, just with a head start on moisture. Because the mulch keeps the seed bed damp, germination often shows up a little sooner and more evenly than dry seed. For many common grasses you will see the first green haze in roughly 5 to 7 days, though slower species can take a couple of weeks, and cold soil stretches everything out.
From there, expect to give it a few weeks before the lawn is ready for its first mow, usually once the grass reaches around three inches. A genuinely established lawn that can handle regular foot traffic and normal watering is more like a couple of months out. For a week-by-week picture of what to expect from any seeded lawn, our guide on how long grass takes to grow from seed maps out the full timeline.
If germination comes in spotty, or a section stays bare well past the expected window, do not just dump more seed on it. Uneven results usually trace back to dry spots, pooling water, or a soil problem, and a quick photo diagnosis can tell you which before you spend money reseeding the same trouble area twice.
The watering schedule that makes or breaks it
If you remember one thing from this guide, make it this: hydroseeding does not reduce the watering commitment, it just makes the first few days more forgiving. The mulch holds moisture better than bare soil, but it can also dry into a crust if you let it, and a dried-out seed bed kills germination just as fast with hydroseed as without.
The pattern that works is light and frequent. For the first week or two you want the mulch layer consistently damp, never soaked and never bone dry, which usually means short watering sessions a few times a day in warm weather rather than one long soak. As the grass germinates and roots begin to reach down, you gradually water less often but for longer each time, training the roots deeper. By the time the lawn is established you are on a normal, infrequent, deep-watering schedule. Rushing that transition is a classic way to end up with a shallow-rooted lawn that struggles in its first summer.
This is exactly the moment a plan tuned to your yard pays off. Right after your lawn goes in, a personalized 12-month care plan can tell you the exact weeks to taper the watering, put down the next round of fertilizer, and take that first mow, all calibrated to your zip code and the grass you actually planted, so you are not guessing during the fragile establishment window. It turns the generic advice above into dated steps for your lawn.
Best grass types and the right season
Hydroseeding works with essentially any grass you would otherwise plant from seed, which is a big part of its appeal. Cool-season lawns like Kentucky bluegrass, tall fescue, fine fescues, and perennial ryegrass hydroseed well, and so do warm-season grasses like bermuda that are commonly established from seed. Because you pick the seed, you are not limited to whatever your regional sod farm happens to grow.
Timing follows the same rules as any seeding project, and those rules differ by grass family. Cool-season grasses establish best in early fall, with warm soil, cooling air, and lighter weed pressure, and spring as the backup window. Warm-season grasses want late spring into early summer, once the soil has truly warmed. Hydroseed outside your grass's window and even a perfect slurry will sit and sulk, so match the method to the calendar, not the other way around.
- Exact seeding rates and mulch application weights for hydroseed vary by grass species and product. Use common bag and label ranges as a starting point, then confirm the numbers for your blend with your state cooperative extension service or your contractor.
- Cost per square foot is intensely local. Instead of trusting any published figure, get two or three quotes from local hydroseeding contractors and price a DIY seed project against them for the same area.
- Tackifier and mulch chemistries differ between products, and some are better suited to steep slopes or erosion control than others. Ask the supplier or contractor which formulation fits your site rather than assuming they are interchangeable.
- The precise best planting dates for your region and grass type come from your local extension office, not a national calendar. Search your state's extension lawn establishment guide for the window that applies to your area.
Recommended products

Jonathan Green Black Beauty Ultra Grass Seed (7 lb)
A cool-season blend of tall fescue, bluegrass, and ryegrass with deep roots and good drought tolerance.
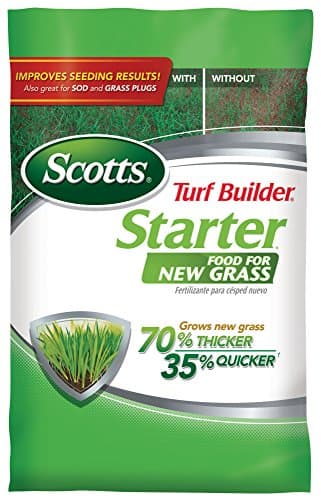
Scotts Turf Builder Starter Food for New Grass
A starter fertilizer with the phosphorus new seedlings need to put down roots in the first few weeks.

MySoil Soil Test Kit
A mail-in soil test that reports pH and the full nutrient profile before you commit to a seeding.
What other guides miss
Most hydroseeding explainers stop at "it is faster and it is green." Three things deserve more weight.
Hydroseeding is only as good as the soil under it. The slurry is a delivery system, not a soil amendment. Spray a beautiful green coat over compacted, unamended, poorly graded dirt and you get a beautiful green coat over a bad seed bed, which becomes a thin, struggling lawn. The homeowners who are thrilled with hydroseeding are almost always the ones who did the unglamorous prep first: cleared the area, fixed the grade, tested the soil, and corrected pH and nutrients. That work matters more than the spraying.
The multi-week watering commitment is the real cost. People treat hydroseeding as a way to buy their way out of effort, then travel for a week during establishment and come home to a patchy failure. The mulch buys you a little slack, not a free pass. If you cannot commit to keeping the seed bed moist for the first few weeks, no method saves you, and hydroseed is no exception.
Slopes and erosion are where it genuinely beats broadcast seed. Here hydroseeding is not just convenient, it is often the right technical choice. On a hillside, a swale, or any bare ground a hard rain would gully, the tackifier-and-mulch blanket holds seed and soil in place while roots take hold, something loose seed simply cannot do. If your project is mostly about erosion control on a slope, hydroseeding stops being a splurge and becomes the sensible tool for the job.
Your hydroseeding action plan
- Confirm it is the right method. A big yard, a new build, or a slope with erosion risk points to hydroseed. A small or flat yard leans toward plain seed. A thin existing lawn may just need overseeding.
- Nail the timing. Line the project up with your grass type's establishment window, fall for cool-season grasses and late spring for warm-season ones.
- Do the prep first. Clear, grade, test, and amend the soil before any slurry goes down. This is where the lawn is won.
- Get real quotes. Collect two or three local contractor prices and compare them against a DIY seed budget for your square footage.
- Water like it is your job. Light and frequent for the first couple of weeks, then deeper and less often as the grass roots in.
- Watch for trouble early. If germination comes in uneven, run a free diagnosis before you reseed, so you fix the cause instead of repeating the mistake.
Hydroseeding is a genuinely good tool, but it is a tool, not a shortcut around the fundamentals. Prep the soil, plant in the right season, and commit to the water, and that green slurry turns into the thick lawn you were picturing. Skip those and it is just expensive paint. Get the groundwork right and hydroseed rewards you with fast, even, erosion-resistant coverage that is hard to beat on the right yard.
Top Picks
- MySoil Soil Test KitCheck price on Amazon
- The Andersons Professional PGF Complete 16-4-8 Fertilizer with 7% Humic DG (5,000 sq ft)Check price on Amazon
- GS Plant Foods Liquid Humic AcidCheck price on Amazon
As an Amazon Associate we earn from qualifying purchases.
Free Lawn Care Tools
Professional hydroseeding runs about $0.10 to $0.19 per square foot with materials and labor included, according to Lawn Love's 2026 cost survey, and LawnStarter's survey puts it at $0.07 to $0.21. Most companies also charge a $300 to $500 minimum, so small yards pay more per square foot than the headline rate. It lands above a DIY seed job and well below sod for the same area. Get two or three local quotes and hold them against those ranges.
Because the mulch keeps the seed bed moist, hydroseed often germinates a little faster and more evenly than dry seed, with the first green haze showing in roughly 5 to 7 days for many common grasses. Slower species or cold soil can stretch that to a couple of weeks. Expect to wait a few weeks before the first mow, usually once the grass reaches about three inches, and a couple of months before the lawn is fully established and ready for regular traffic.
You can rent a small hydroseeding unit and load your own seed, mulch, and tackifier, and for a medium-size yard it can beat a contractor's price. On a small lawn, the rental and materials often cost about as much as hiring the job out, and plain seed would have been cheaper still. DIY hydroseeding makes the most sense when you want better coverage than hand-spreading gives but a pro quote feels steep, and you do not mind the mixing and cleanup.
Both plant the same seed, so they grow the same kind of lawn. Hydroseeding wraps the seed in a moisture-holding, erosion-resisting mulch blanket, which gives faster, more even germination and much better results on slopes, at a higher price. For a small, flat yard, traditional broadcast seeding usually wins on value. For large or sloped ground, hydroseeding often earns its cost.
Keep the mulch layer consistently damp for the first week or two, which usually means short, light watering sessions a few times a day in warm weather rather than one heavy soak. Never let the seed bed dry into a crust, and never leave it standing in water. As the grass germinates and roots reach down, gradually water less often but longer each time to train deeper roots, easing into a normal deep and infrequent schedule once the lawn is established.
A hydroseed slurry typically blends grass seed, protective mulch made from wood or paper and cellulose fiber, a sticky tackifier that binds everything to the soil, and starter fertilizer, all suspended in water. The bright green color comes from a harmless dye that lets the operator see where the slurry has landed for even coverage. The dye is not fertilizer, and it fades within a week or two as the real grass comes up.
Hydroseeding is worth it for medium to large yards and for slopes or erosion-prone ground, where the mulch and tackifier hold seed that rain would wash off a bare seed bed. On a small, flat lawn, the $300 to $500 minimum most companies charge, per LawnStarter's 2026 survey, often makes plain seed or overseeding the better spend. Either way, the seed needs consistent water for the first few weeks. Price the job against a DIY seed budget for your square footage first.

Beat weeds and brown spots from your phone
Snap a photo, get the fix, and follow a plan timed to your soil and weather. Free on iPhone.
Related Articles
 Lawn Care Tips
Creeping Thyme Lawn: Where It Fits and How to Start Small
Oct 13, 2026•3 min read Lawn Care Tips
Powdery Mildew on Grass: Check the White Coating and Fix the Conditions
Oct 8, 2026•3 min read Lawn Care Tips
Florida Betony in Lawns: Identify the Tubers and Control Regrowth
Oct 7, 2026•3 min read

