Creative Lawn Edging Ideas
 James ThorntonLawn Equipment & Maintenance Expert | 20 Years
As an Amazon Associate we earn from qualifying purchases.
Grass creeping into your beds, a border you have to trim by hand every week, mulch washing onto the lawn: those all point to one fix, a defined lawn edge. The right edging controls the grass, cuts your mowing time, and makes the whole yard look finished. The trick is matching the material to your budget, your grass type, and whether you want to mow straight over it.
This guide compares the main lawn edging ideas side by side, then walks through installing the most popular ones. According to Purdue University Extension, clear transitions between turf, beds, and hardscape improve maintenance efficiency and reduce damage to both turf and ornamentals. A good edge is the simplest way to build those transitions.
The best lawn edging depends on your goal. For the cleanest, lowest-maintenance result, install a flush brick or paver mow strip you can run the mower wheel over, so you never have to string trim the edge. For a nearly invisible modern line, use steel or aluminum set just above soil level. For the cheapest option, cut a simple V-shaped spade trench, which costs nothing but your time and needs a recut once or twice a season.
To stop grass from invading beds, the edge has to go deep enough to cut runners: 3 to 4 inches for cool-season lawns, and 4 inches or more for aggressive warm-season grasses like bermuda and zoysia. Most edging is a weekend project. Measure your total border with our lawn size calculator before you buy so you order the right footage.
Lawn Edging Materials Compared
Here is the whole decision in one place. The last column is the one most people forget to ask about: can you actually mow over it, or will you be trimming that edge by hand forever?
| Edging | Cost per linear foot | Lifespan | DIY difficulty | Mow over it? |
|---|---|---|---|---|
| Spade / trench edge | $0 to $1 | Recut each season | Easy | Yes, mow right along it |
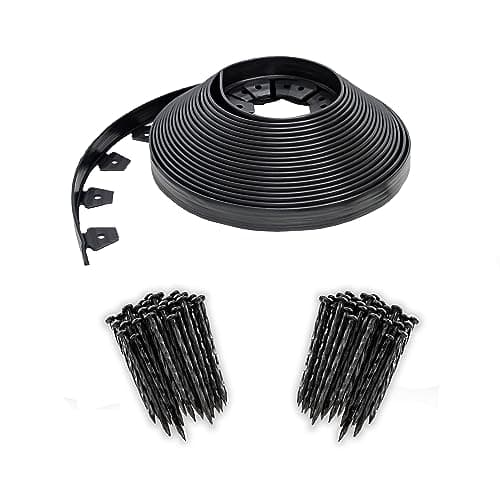
| Plastic / poly roll | $1 to $2 | 5 to 10 years | Easy | No, wheels deform it |
| Steel | $3 to $6 | 20 to 30 years | Moderate | Yes, if set low |
| Aluminum | $3 to $7 | 25+ years | Moderate | Yes, if set low |
| Brick mow strip | $4 to $8 | 20 to 30 years | Moderate | Yes, this is the ideal |
| Paver mow strip | $4 to $9 | 25+ years | Moderate | Yes, this is the ideal |
| Natural stone | $6 to $15 | Decades | Harder | Sometimes, tops are uneven |
| Poured concrete curb | $6 to $15 DIY, $12 to $25 installed | 25+ years | Hard or pro | Yes, if poured as a flat mow curb |
| Living plant border | $1 to $4 | Ongoing | Easy | No, trim instead |
Two patterns fall out of that table. If you want to stop trimming, a flush masonry mow strip or low-set steel is worth the extra cost. If budget is the priority, a spade trench is free and works, it just needs recutting. Everything else is a trade between those two poles.
The Mowable Edge: Why a Mow Strip Wins
The single biggest time-saver in this whole guide is a mow strip: a flat band of brick, paver, or concrete set flush with the lawn so one mower wheel rides on it while the deck cuts the grass at the edge. Because the wheel is supported at the exact height of the turf, you get a clean cut right to the border with no scalping and no separate trimming pass. Ohio State University Extension notes that consistent mowing height around edges reduces scalping, which is common where lawns meet hard edges, and a flush strip is the cleanest way to hold that height.
Steel and aluminum can act as a mowable edge too, as long as you set the top just above soil level (about a quarter to half an inch) so the deck clears it. Plastic edging is the exception: it looks like something you could mow over, but mower wheels deform soft plastic, especially in summer heat, so keep the wheels on the turf beside it.
Match the Edging to Your Yard
Before you buy, run your yard through four quick filters.
Budget. Low budget (under $2 per foot) means spade trenches, plastic, or repurposed brick. Mid budget ($2 to $6) opens up steel, pavers, and timbers. High budget ($6 and up) is where poured concrete curbing and natural stone live.
Grass type. This decides how deep you go. Warm-season grasses like bermuda and zoysia spread by aggressive runners that slide right under a shallow edge, so they need a barrier 4 inches or deeper, or a spade edge you recut on schedule. Cool-season grasses spread mostly by tillering and behave with a shallower 3 to 4 inch barrier.
Climate. In cold regions, rigid materials laid on bare clay heave with freeze-thaw. University of Minnesota Extension notes that shallow concrete or brick laid directly on clay shifts under repeated freezing, and a 4 to 6 inch compacted gravel base fixes it. In hot regions, UV and high soil temperature break down cheap plastic fast, so metal or masonry lasts longer.
Curves versus straight lines. Flexible materials (steel, aluminum, plastic) bend into sweeping curves. Rigid materials (brick, pavers, timber) suit straight runs and formal geometry. Lay a garden hose on the ground to test a curve before you commit, then mark it with paint or flour.
How to Install the Most Popular Edges
1. Spade-Cut Trench Edge (the free option)
A spade edge is just a V-shaped trench separating lawn from bed. It is the cheapest lawn edging there is, and a crisp trench line looks surprisingly high end.
- Mark the line with a hose, rope, or marking paint.
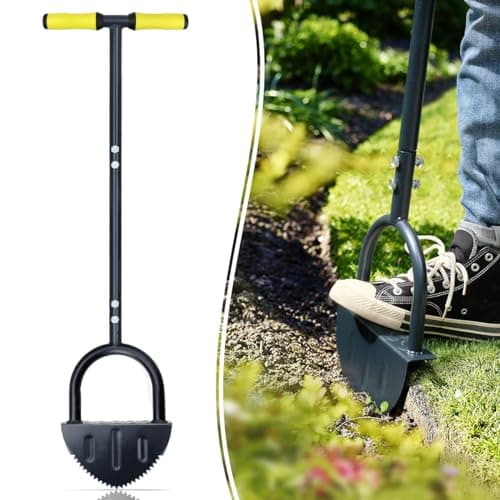
- Cut the trench. Hold a half-moon edger or flat spade vertical on the lawn side and step down 3 to 4 inches. Penn State Extension notes a 3 inch minimum depth is needed to interrupt cool-season grass roots; go deeper for bermuda and zoysia.
- Bevel the bed side so the trench forms a V, about 4 to 6 inches wide at the top.
- Lift out the sod slice and compost it or drop it in a low spot.
- Mulch to the edge, stopping about an inch below the lawn surface so the line stays crisp.
Upkeep: recut once or twice a season, or every 6 to 8 weeks in a long growing season.
2. Brick or Paver Mow Strip (the low-maintenance winner)
Set flat and flush with the lawn, brick or pavers give you the mowable edge from the cross-section above. This is the install that pays you back every single mow.
- Excavate a trench the width of your brick plus an inch, about 6 inches deep. Standard clay brick is 4 by 8 inches and roughly 2.25 inches thick.
- Add and compact the base: 3 to 4 inches of crushed stone (3/4 inch minus), tamped in 2 inch lifts. University of Minnesota Extension stresses strong base compaction in freeze-thaw climates to prevent heaving.
- Screed 1 inch of coarse sand level over the base.
- Lay the brick tight to a string line, tapping each level with a rubber mallet so the tops sit flush with, or a hair above, the lawn.
- Lock it in: backfill soil on the outside, then sweep sand or polymeric sand into the joints and mist to set.
Upkeep: reset the occasional heaved brick and top up joint sand every few years.
3. Steel or Aluminum Edging (the invisible line)
Steel and aluminum give a crisp, nearly invisible border that suits modern and formal yards alike. Steel is stronger and develops a rust patina, aluminum is lighter and will not corrode.
- Cut a shallow slot 2 to 3 inches deep along your line, setting the top edge just above lawn height so the mower clears it.
- Interlock the sections end to end per the manufacturer's slots or pins.
- Stake every 2 to 3 feet and at every corner to lock the edging against sideways bowing.
- Backfill and firm both sides, bringing turf grade to the strip on the lawn side and mulch on the bed side.
Upkeep: re-stake any section that bows out. For a painted look, buy powder-coated stock rather than painting raw steel.
4. Natural Stone, Timber, and Living Borders
For character over pure function, three more options work well behind the primary edge:
- Natural stone. Fieldstone or flagstone laid as a ribbon or a low stacked course. Bury at least a third of each stone to keep it from shifting. Great on slopes and in cottage gardens, though the uneven tops make it a poor mow strip.
- Wood and timber. Cedar, redwood, or ground-contact-rated lumber pinned with rebar every 3 to 4 feet. Warm and structural, ideal around raised vegetable beds.
- Living plant borders. Creeping thyme, mondo grass, dwarf boxwood, or lavender in a narrow band. Pair a living border with an initial spade trench and it blocks grass encroachment surprisingly well, but you trim it rather than mow it.
Keeping Grass Out of Your Flower Beds
The most common edging complaint is not looks, it is grass runners marching into the mulch. The fix is depth plus a clean break. Any edge that only sits on the surface will eventually be crossed by stolons and rhizomes.
- Go deep enough to cut runners. 3 to 4 inches stops most cool-season grass; bermuda, zoysia, and St. Augustine need 4 inches or more of in-ground barrier because their runners travel laterally just under the surface.
- Keep a clean air gap. A spade trench works because grass runners will not bridge an open V of bare soil. A masonry or steel edge works because it is a solid vertical wall. Mulch piled flush over the top of an edge gives runners a bridge, so keep mulch just below the edge lip.
- Recut warm-season edges on schedule. Even a good barrier gets tested by bermuda. A quick recut every 6 to 8 weeks in summer keeps the line honest.
If you are also planning the beds themselves, our guide on integrating garden beds with lawns covers how to shape and place beds so the edges feel intentional, and pathway and stepping-stone ideas shows how edges tie into walkable routes.
Cost, Value, and When to Hire Out
Simple spade edges cost only your time. DIY plastic or basic steel usually lands at $1 to $4 per foot in materials. A brick or paver mow strip with base and sand runs $4 to $8 per foot. Professionally installed concrete curbing or custom stonework can reach $12 to $25 per foot with labor.
Spend on permanent, mowable edging along the high-visibility, high-traffic lines: the driveway strip, front walk, and foundation beds. Use cheaper spade or plastic edges in side yards and back beds where the layout might change. Hiring out makes sense for long concrete curbing that needs equipment, tricky grades and drainage, or a fast uniform finish before selling the house. For most yards a hybrid works best: DIY the accessible runs, and bring in help only for the one demanding section.
Before you buy anything, walk the yard once with the common beginner mistakes in mind, and check the tool list in essential lawn care tools. And always call your local utility locate service before digging deeper than a few inches near driveways, streets, or where gas and electric lines might run.
Conclusion
Messy borders and creeping grass are a solved problem. Pick the material that fits your budget and grass type, decide up front whether you want to mow over the edge or trim it, and go deep enough to stop runners. If you take one thing from this guide, make it the mow strip: a flush band of brick or paver is the edge that quietly saves you time on every mow while making the whole yard look deliberately finished. Start with one high-impact line this month, measure it with the lawn size calculator, and build out from there once you see the difference a clean edge makes.
Free Lawn Care Tools
A spade-cut trench edge is the cheapest option, costing nothing but your time and a spade or half-moon edger. You cut a 3 to 4 inch deep V-shaped trench between the lawn and the bed. The tradeoff is upkeep: you need to recut the line once or twice a season as the grass grows back toward it. After a trench, thin plastic roll edging is the next cheapest at about $1 to $2 per linear foot.
A brick or paver mow strip set flush with the lawn is the best edge to mow over, because one mower wheel rides on it and the deck cuts the grass cleanly with no scalping or trimming. Steel and aluminum work too if you set the top just above soil level so the deck clears it. Do not try to mow over plastic edging, since mower wheels deform soft plastic, or over raised stone and timber, which sit too high.
Go at least 3 to 4 inches deep for cool-season grasses like fescue and Kentucky bluegrass, which spread mostly by tillering. For aggressive warm-season grasses like bermuda, zoysia, and St. Augustine, use a barrier 4 inches or deeper, because their runners travel laterally just below the surface and slide under anything shallower. A shallow, surface-only edge will eventually be crossed by runners.
Combine depth with a clean break. Install an in-ground barrier or cut a spade trench deep enough to sever runners, then keep mulch just below the top of the edge rather than piled over it, since mulch flush with the lawn gives grass a bridge to cross. For bermuda and other warm-season grasses, recut the edge every 6 to 8 weeks in summer, because even a good barrier gets tested by their runners.
A mow strip is a flat band of brick, paver, or concrete set flush with the lawn so a mower wheel can ride on it while the deck trims the grass right at the edge. You do not strictly need one, but it is the single biggest time-saver in edging because it removes the separate string-trimming pass entirely. It is most worthwhile along high-traffic, high-visibility borders like the driveway, front walk, and foundation beds.
Raw steel edging develops a thin layer of surface rust that forms a stable patina many homeowners actually like, and it does not compromise the edging's strength for decades. If you want to avoid the rusted look, choose aluminum, which will not corrode, or buy powder-coated steel. Painting raw steel after installation is possible but tends to chip over time compared with a factory powder coat.

Your lawn plan, in your pocket all season
Grass ID, a season plan, soil-timed reminders, and a lawn journal that remembers what you did. Free on iPhone.
Related Articles
- Lawn Care Tips
How Big Is the American Lawn? 2,518 Measured Yards Say 3,000 Square Feet, Not a Quarter Acre
Sep 15, 2026•6 min read - Lawn Care Tips
Gray Leaf Spot in Lawns: How to Identify and Treat It
Sep 13, 2026•6 min read - Lawn Care Tips
Scotts DiseaseEx Instructions: Rates, Spreader Settings, and Timing
Sep 13, 2026•5 min read